Hello there! So you want to run a Lightning node? Well, you’ve come to the right place. Voltage is an infrastructure provider focusing exclusively on Bitcoin. Through our platform, you’re able to easily create Lightning nodes, Bitcoin nodes, and more. Running your own node gives you more control and you don't have to trust anyone else's node. Today we’ll walk through how to create a Lightning node in about 2 minutes on Voltage. These nodes are dedicated only to you and you have 100% control over the node. Let’s dig in!
Create an Account
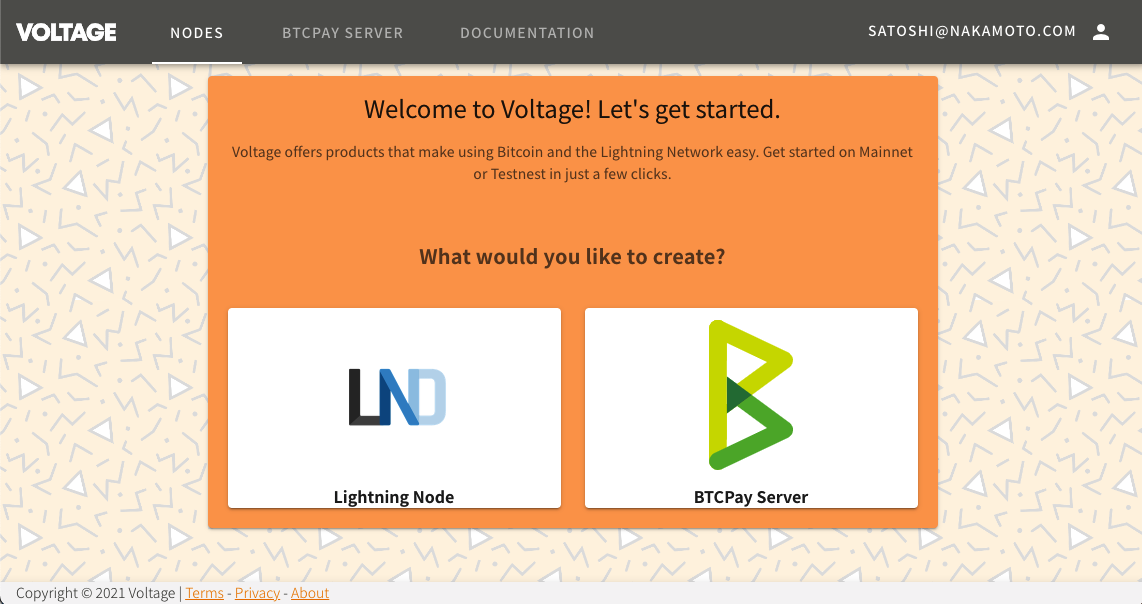
Of course, the first step is creating a Voltage account if you don’t already have one. You can sign up at https://app.voltage.cloud/register. After you’ve signed up, you’re presented with the options to create a Lightning node or BTCPay Server. We’ll select a Lightning node.
Creating the Node
Once you’re on the node creation page, you’ll be prompted to select your Billing Option, Node Type, and Network. For this demo, we’ll use our free trial which lets us run a Testnet node for 7 days. The free trial can only be redeemed with a ‘Standard’ node type and on the Testnet Network.
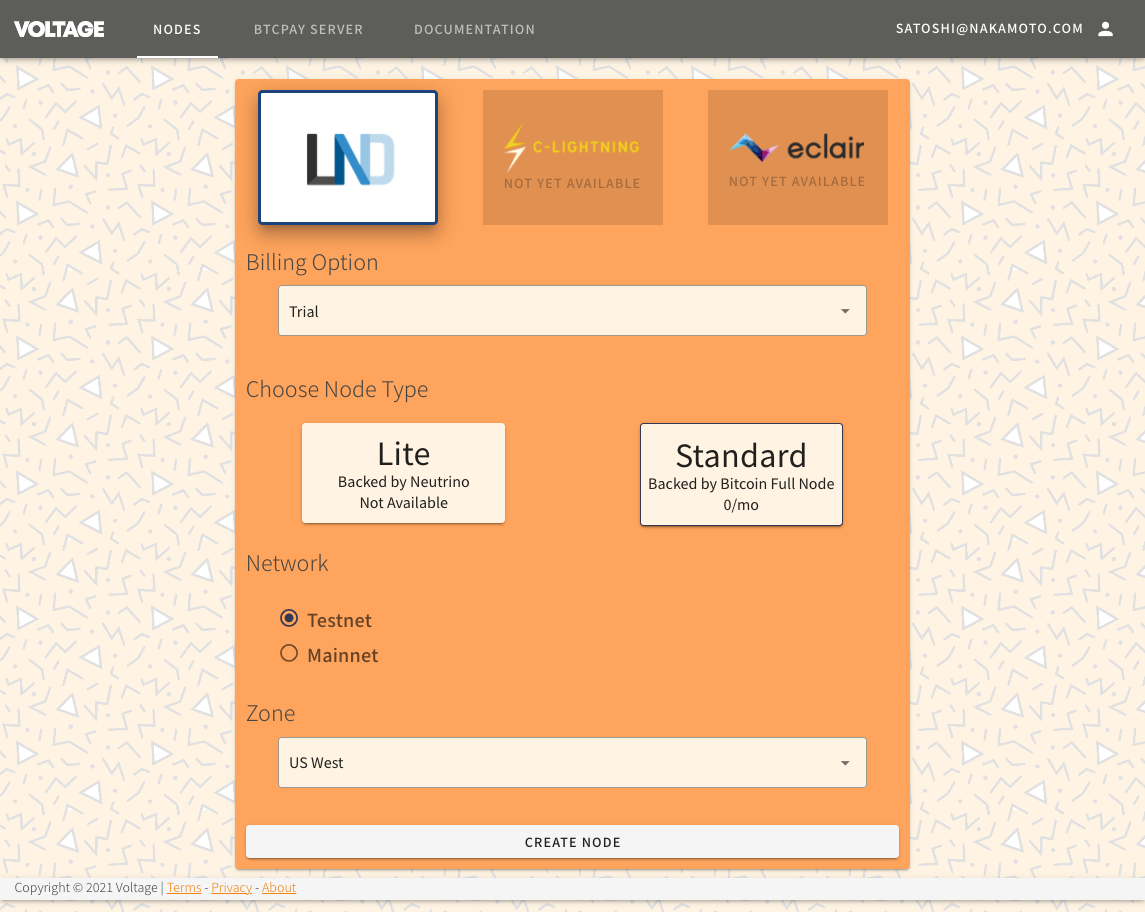
For the sake of explanation, we’ll cover the differences in these parameters.
Billing Options
- Pay per Hour: This requires no up-front payment. Rather, we’ll track how many hours your node runs and send you an invoice at the end of the month. These are perfect for development nodes that are only needed for a few days at a time.
- Pay per Month: This requires you to start a subscription that is billed up-front and once a month. This is ideal when you want to run your node for a longer term.
- Pay per Year: This is the same as Pay per Month, however you’re billed once a year instead. This allows you to save about 15% on your node’s annual cost.
Node Type
- Lite node: This node is backed by Neutrino and is on shared infrastructure. These nodes are also only accessible on the network via Tor. These are ideal for personal wallets and development nodes.
- Standard node: This node is connected to a Bitcoin full node and is on shared infrastructure. These nodes are also only accessible on the network via Tor. These are ideal for small routing nodes, small business nodes, etc.
- Professional node: This node is connected to a Bitcoin full node and is on a dedicated server only for you. These nodes are accessible on the network via Tor and Clearnet. These nodes are ideal for business critical deployments and large routing nodes.
Network
- Testnet is the Bitcoin testing network. This is what you’d like to use when doing development or testing for applications.
- Mainnet is Bitcoin’s main network that the world uses. This is for real world use and real transactions.
Zone
This is the geographical location where your node runs. At the time of writing, we only have ‘US West’, but we'll be adding more zones in the future.
Now that we have some of those details out of the way, let’s create our node! Once you’ve selected your options, click the ‘Create Node’ button.
Next, we’ll be prompted to give our node a name and password. The node’s name must be globally unique and will be used for your node’s API endpoint. You’ll also need to create a new password for every node because LND requires a password when creating the wallet. This is used for encryption of the node and the node’s data. Please choose a strong password! Also, pay attention to the warnings below the password field. Voltage does not have access to your node’s password or sensitive data so there is no possible way for us to reset your password.
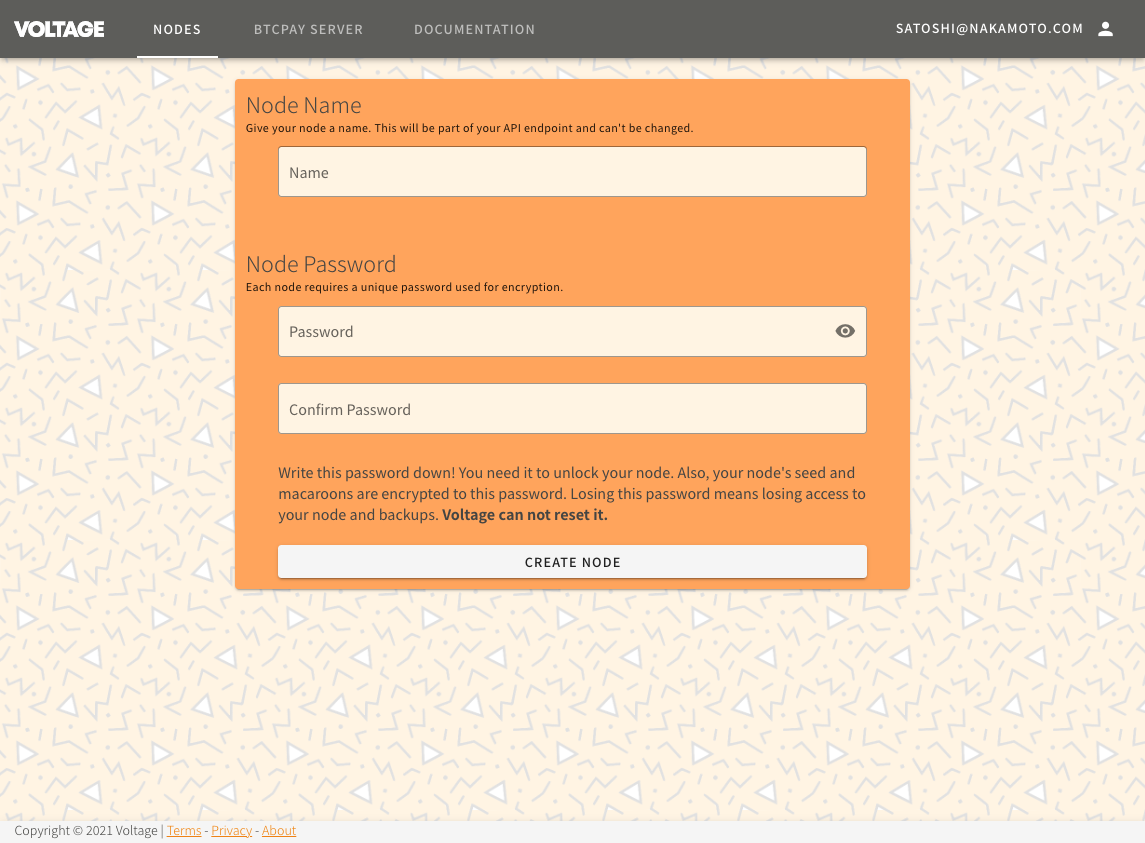
After we’ve given our node a name and password, click ‘Create Node’ once more.
Node Provisioning
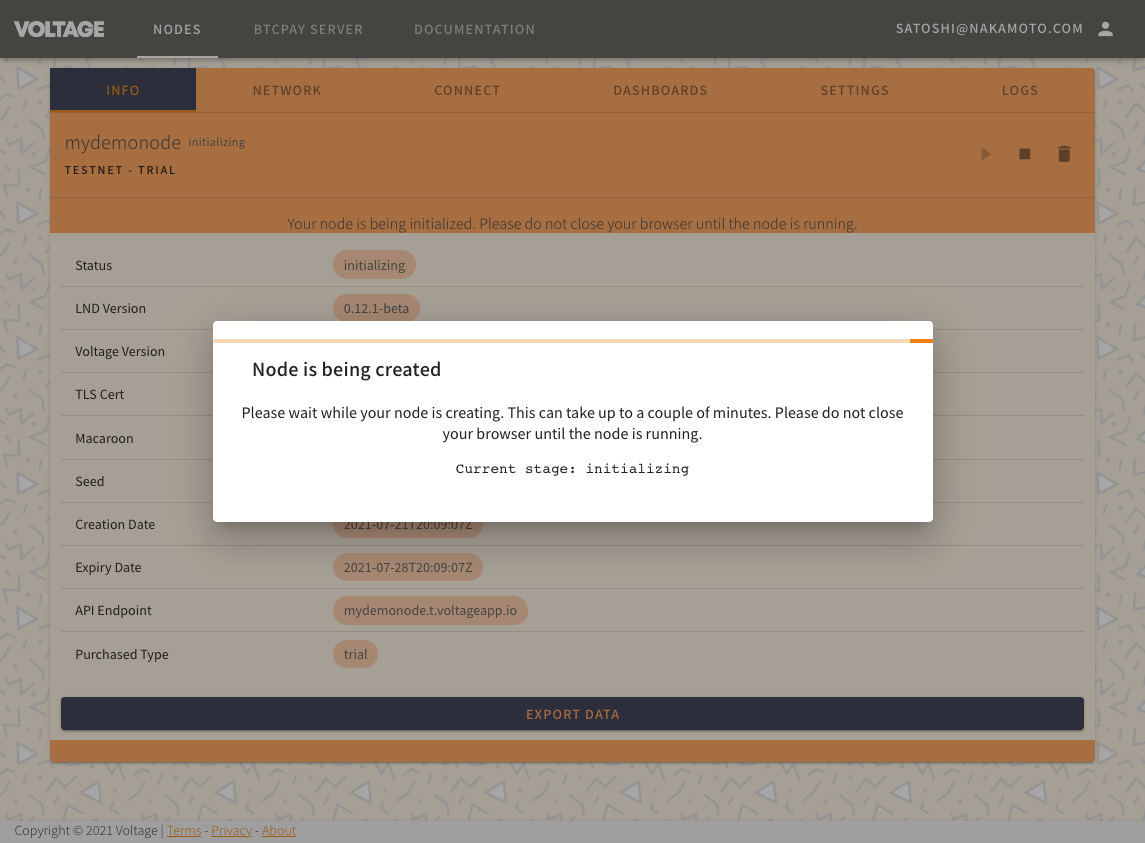
Once you create your node, our system goes to work provisioning your node just for you. You’ll be redirected into your node’s page with a modal showing you what stage of creation your node is in. Be sure to leave your browser window open until your node reaches the ‘running’ state. This usually takes less than 2 minutes. Once your node is ready, the modal will display a button message stating your node is ready. Simply click the ‘Continue’ button and you’ll be directed to our Connect tab. This means your node is ready to use!
Connecting
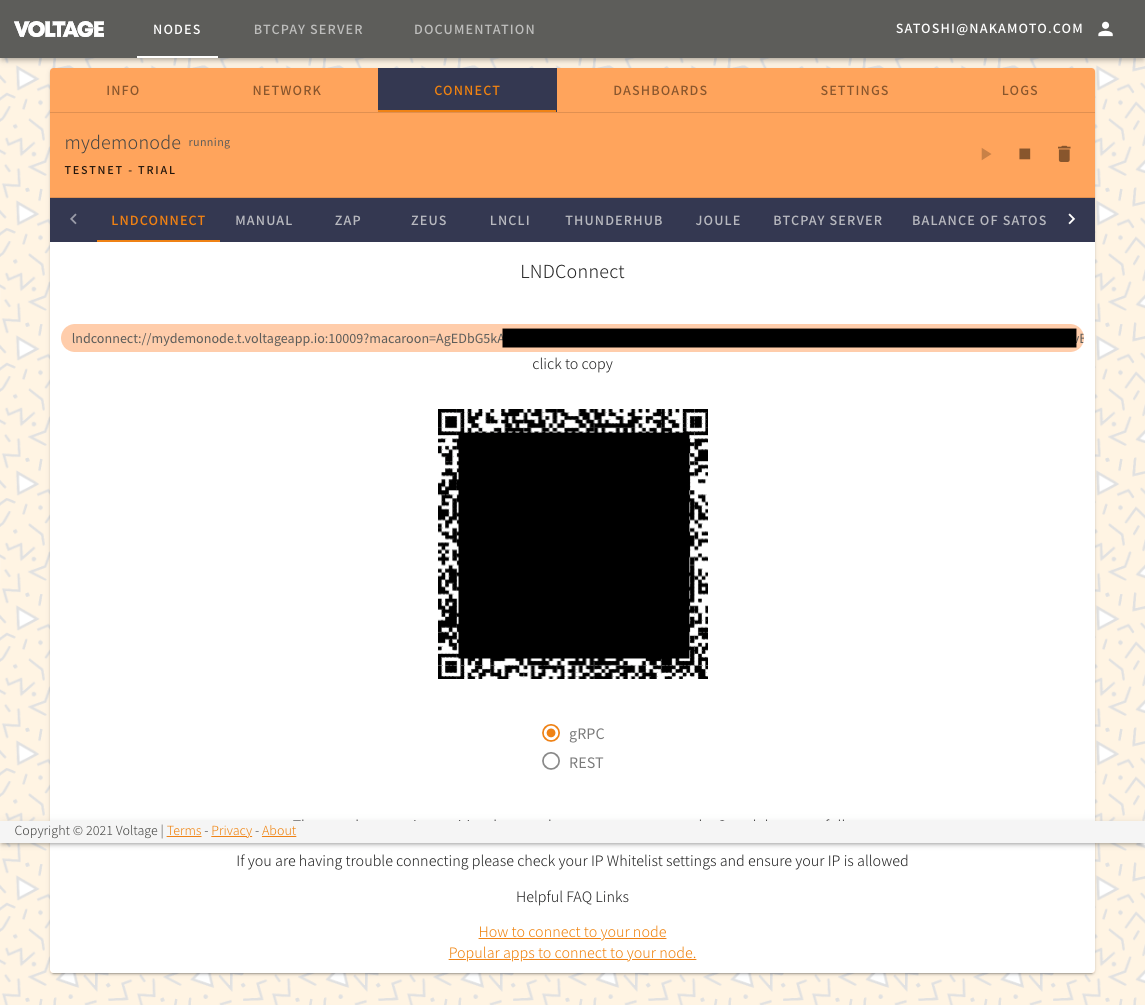
Connecting to your node is very simple with our connect page. We display QR code and API information so you can connect from any application. We display instructions for some of the most popular applications like Zap, Zeus, lncli, Thunderhub, and more. It’s as easy as scanning the QR code or copy/pasting the information. Now you’re ready to deposit sats and open channels!
Bonus: Thunderhub
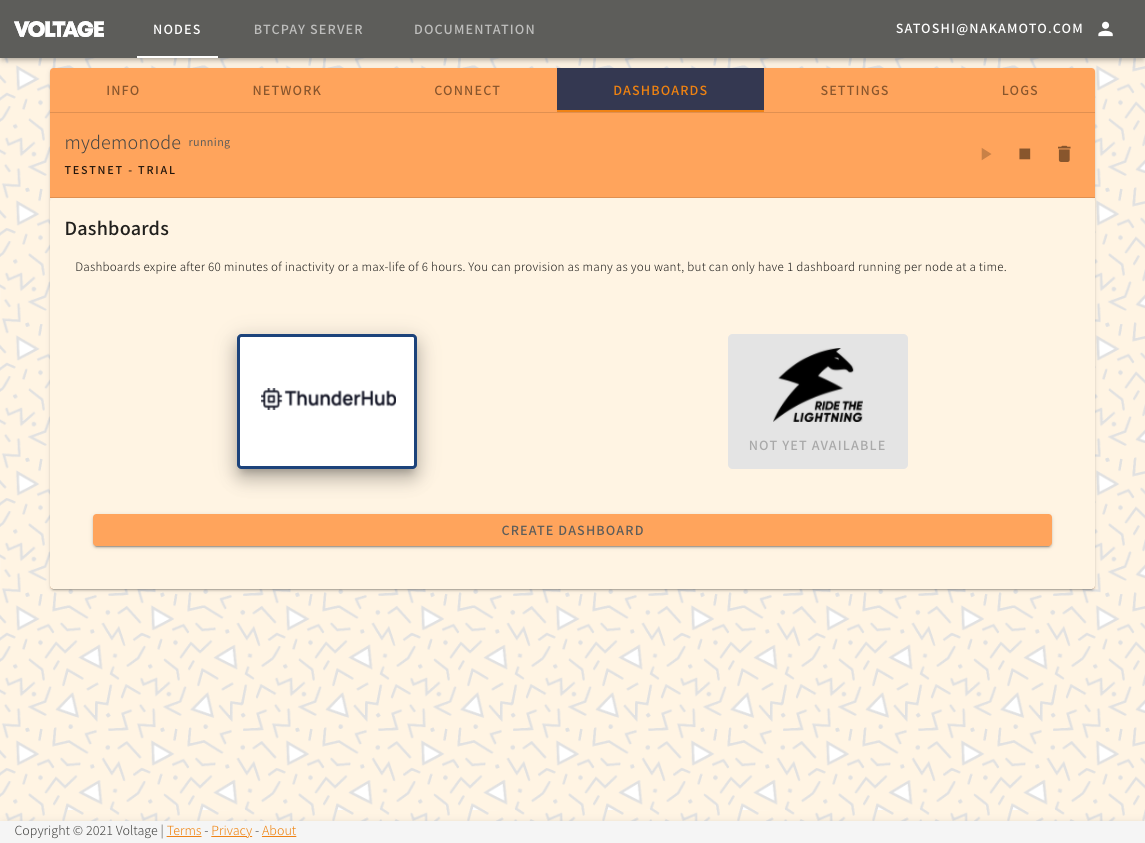
As an added bonus, we’ll show you how to create a Thunderhub dashboard. These dashboards are free and you’re able to create them for your node right in the platform. To get started, navigate to the ‘Dashboards’ tab on your node’s page. Make sure Thunderhub is selected, then click ‘Create Dashboard’. It will take about 30 seconds to a minute to create your dashboard. Once it’s created, simply click the Open button in the top right. To login, use the same password you used when creating your node. Boom. Now you can manage your node without ever leaving the platform.
Closing
That’s it. That’s how easy it is. Through the Voltage platform, you’re able to create a Lightning node in 2 minutes and with a few clicks of a button. The node that’s created is dedicated to you and you have access to all APIs. It’s never been easier to get on Lightning.
This is only the beginning. There’s so much more to come and lots of features to be released. Start using Lightning today!

